Create Home Page and Make it Static Page #
Certainly! Here’s a step-by-step guide on how to create a static homepage in WordPress:
- Log in to the WordPress Admin Dashboard: Access your WordPress website’s admin area by entering your username and password. The login URL is typically “https://yourwebsite.com/wp-admin“.
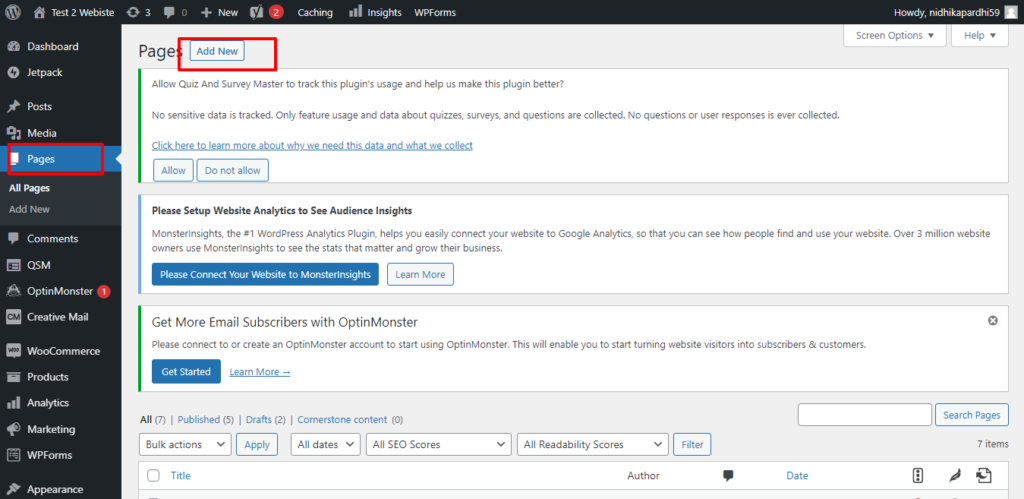
- Create a New Page: In the WordPress Admin Dashboard, navigate to the “Pages” section located on the left-hand side. Click on “Add New” to create a new page for your homepage.
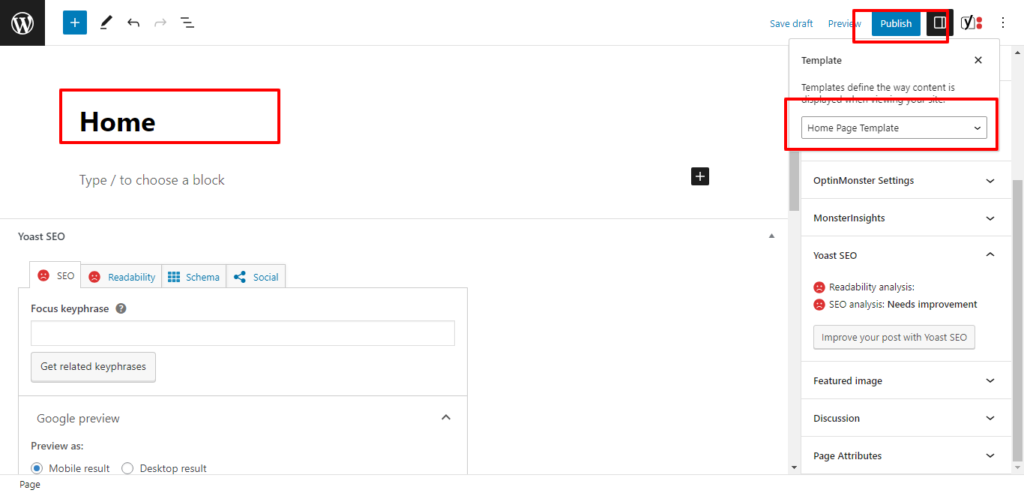
- Add Content to the Homepage: Give your homepage a title (e.g., “Home” or “Welcome”) and add the desired content using the editor. You can use the formatting options provided to style your text, add images, embed videos, or any other content you want to display on your homepage.
- Set the Home Page Template (Very Important): Depending on your theme, you may have the option to select a specific page template for your homepage. Templates can provide different layouts and functionality. Look for a “Home Page” or “Blog Template” section on the right-hand side of the page editor. Choose a suitable template for your homepage, or leave it as the default template if you don’t have any specific options.
- Publish the Homepage: Once you have finished adding content and selecting a template, click the “Publish” button to make your homepage live on your website.
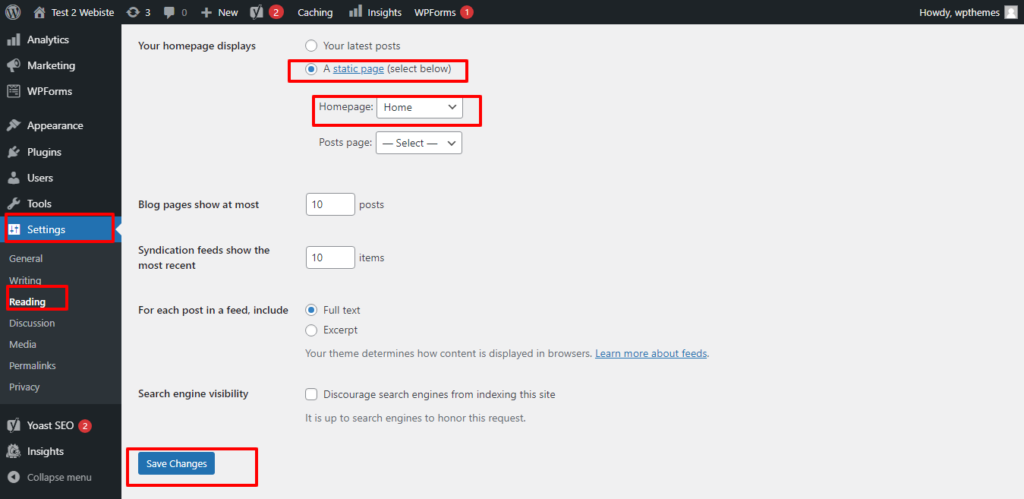
- Set the Homepage as a Static Page: To designate the newly created page as your static homepage, go to the “Settings” section in the WordPress Admin Dashboard and click on “Reading”.
- Configure Front Page Settings: In the “Reading Settings” page, you’ll see options for “Your homepage displays”. Select the “A static page” option.
- Choose the Homepage: In the “Homepage” dropdown menu, select the page you created in Step 2 as your static homepage.
- Save Changes: Scroll down to the bottom of the page and click on the “Save Changes” button to save your settings.
- View Your Homepage: Visit your website’s front-end by entering your website URL in a new browser tab. You should now see your newly created page set as the static homepage.
Congratulations! You have successfully created a static homepage in WordPress. You can always edit the page content or change the template by accessing the “Pages” section in the WordPress Admin Dashboard and making the desired modifications to the homepage page.
Create Other Page and Menu #
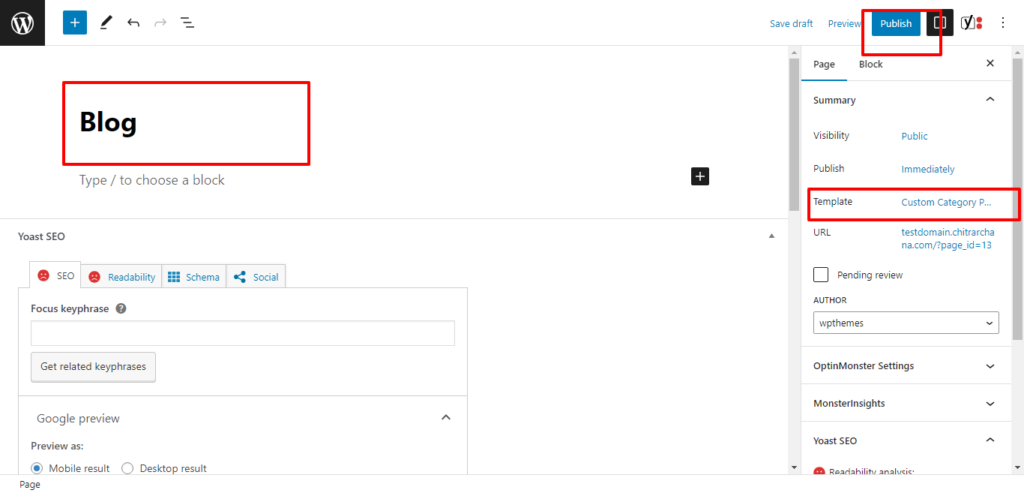
Create other Pages you want to add and then Create the Menu.
Create the Main Home Page Menu #
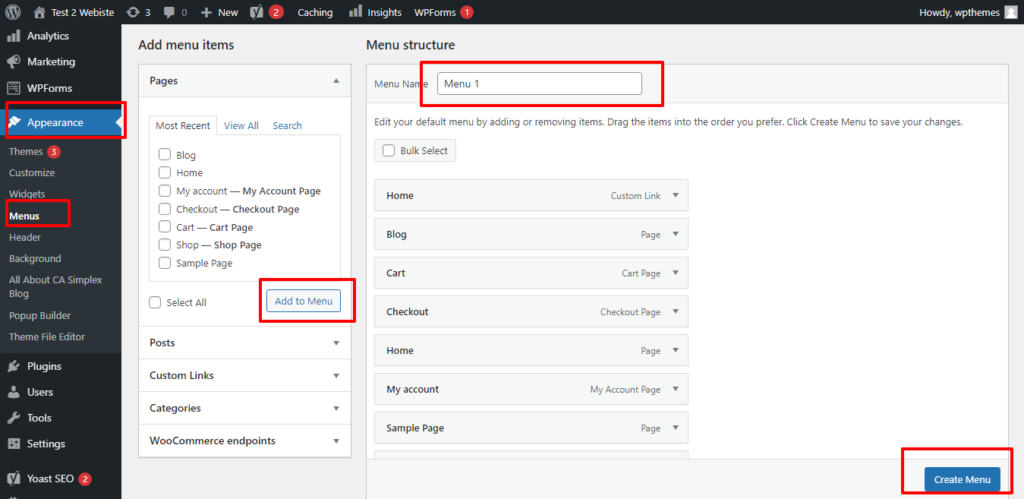
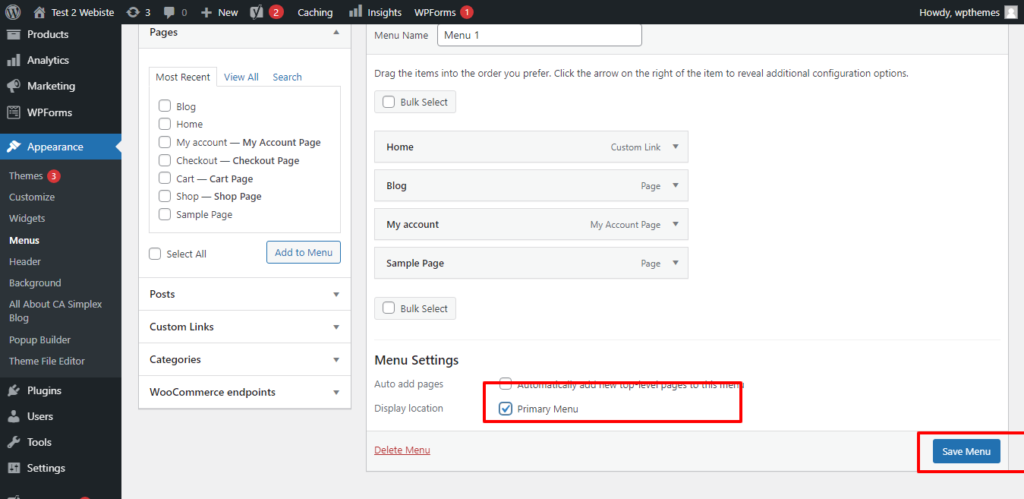
To create the main home page menu in WordPress, follow these steps:
- Log in to the WordPress Admin Dashboard: Access your WordPress website’s admin area by entering your username and password. The login URL is typically “https://yourwebsite.com/wp-admin“.
- Navigate to the Menu Settings: In the WordPress Admin Dashboard, go to the “Appearance” section located on the left-hand side. Hover over it to reveal a submenu, then click on “Menus”.
- Create a New Menu: On the “Menus” page, you’ll see the available menus. If you want to create a new menu specifically for your home page, click on the “Create a new menu” link.
- Name the Menu: Enter a name for your menu in the “Menu Name” field. This name is for your reference and won’t be visible on the website. For example, you can name it “Main Menu” or “Home Page Menu”.
- Add Pages to the Menu: To add pages to your menu, look for the section labeled “Add menu items”. On the left-hand side, you’ll see a list of pages, posts, custom links, and other content types that you can add to the menu.a. Pages: Select the pages you want to include in the home page menu by checking the corresponding checkboxes next to their names. Click the “Add to Menu” button to add them to the menu.b. Custom Links: If you want to include external links or custom URLs in your menu, click on the “Custom Links” tab. Enter the URL and the link text, then click “Add to Menu”.c. Reorder Menu Items: To change the order of the menu items, simply drag and drop them into the desired position.
- Configure Menu Settings: On the “Menu Settings” section located below the menu items, you may find options such as “Theme locations” or “Display location”. Choose the appropriate location for your main home page menu, which is typically labeled “Primary Menu” or “Main Menu”. The available options depend on your theme.
- Save the Menu: Once you have added the desired pages and configured the settings, click on the “Save Menu” button to save your changes.
- View the Menu on the Front-end: Visit your website’s front-end by entering your website URL in a new browser tab. You should now see the main home page menu displayed on your website.
Congratulations! You have successfully created the main home page menu in WordPress. You can always go back to the “Menus” page in the WordPress Admin Dashboard to edit or modify your menu by adding or removing pages, changing the order, or updating the menu settings.
Making The Home Page content using Customizer #
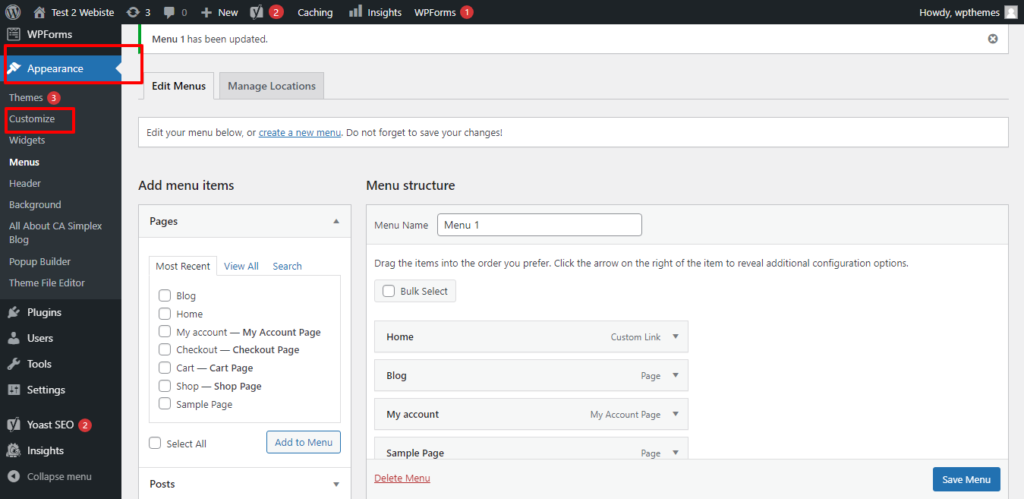
To Edit the Home Page go to Front Page
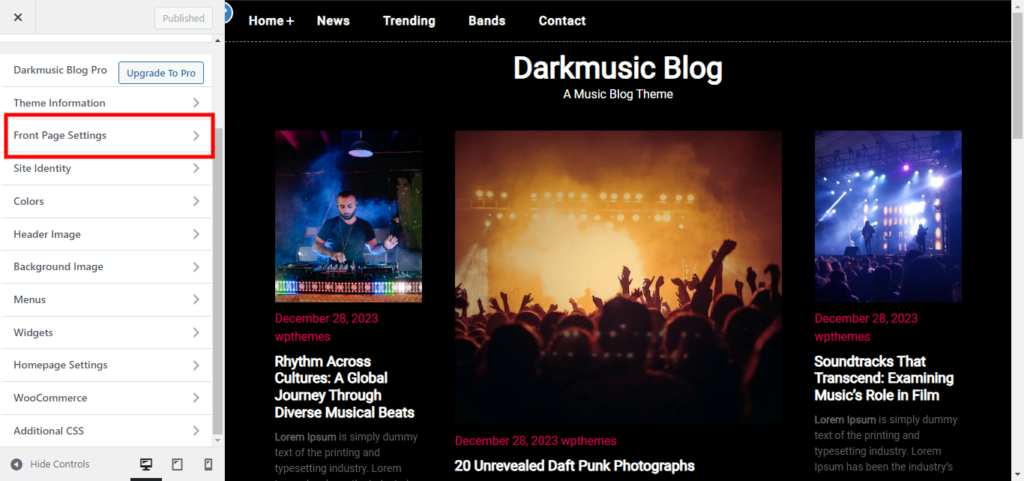
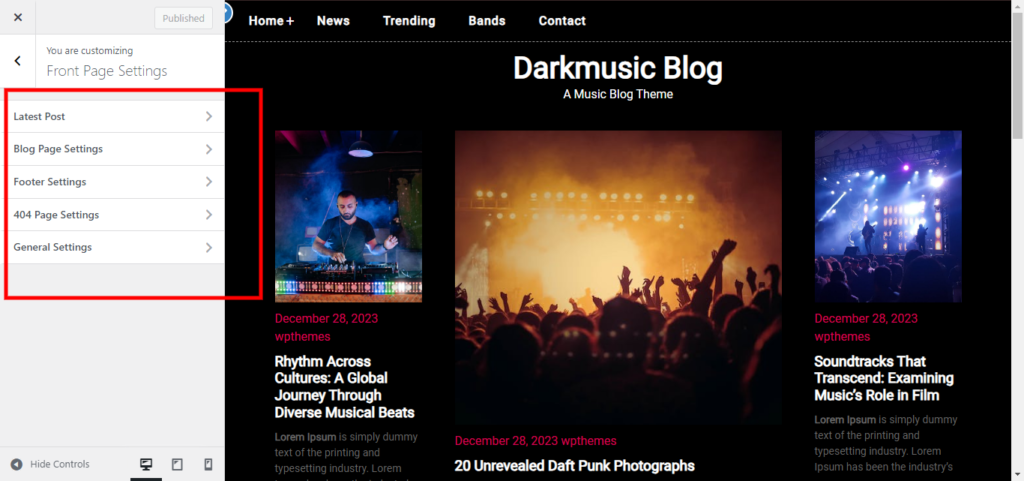
Section (Latest Post) #
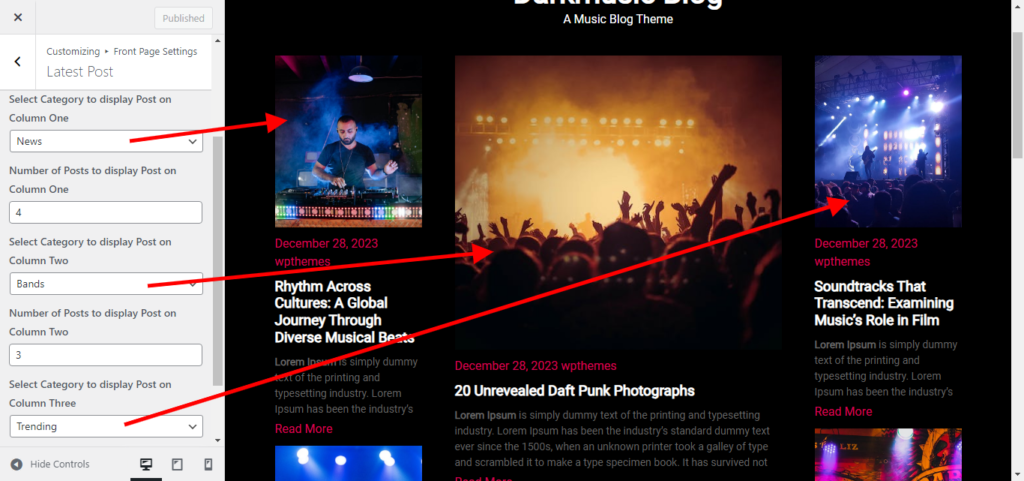
Click on Latest Post Section to edit this section.Add the content you want to display in this section and save the changes buy clicking publish button.
Note: Before this section to edit you need to create the post check for creating the Post
You can Add three different categories and number of post per column in this section as per your requirements.
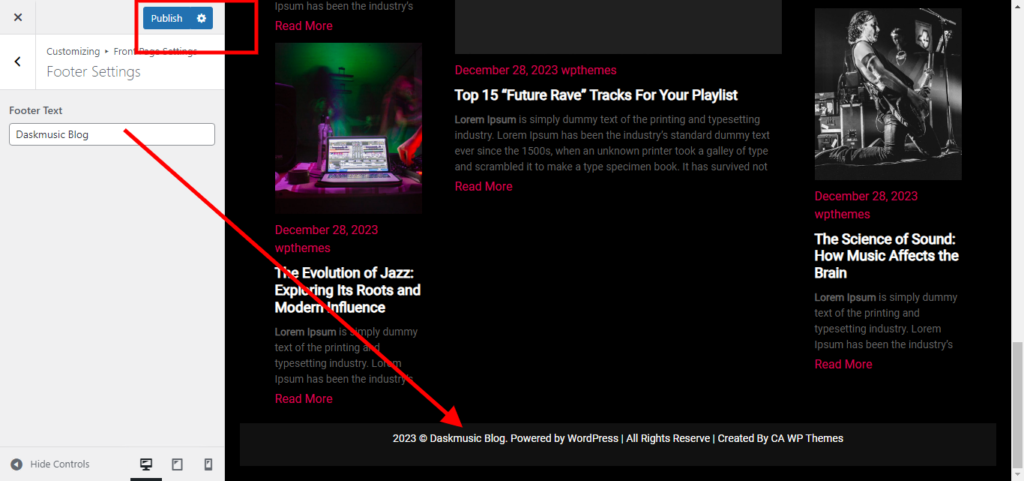
Edit Footer Text #
