Table of Contents
How to Create Post and add Category #


To create a post and add categories to it in WordPress, follow these steps:
- Log in to the WordPress Admin Dashboard: Access your WordPress website’s admin area by entering your username and password. The login URL is typically “https://yourwebsite.com/wp-admin“.
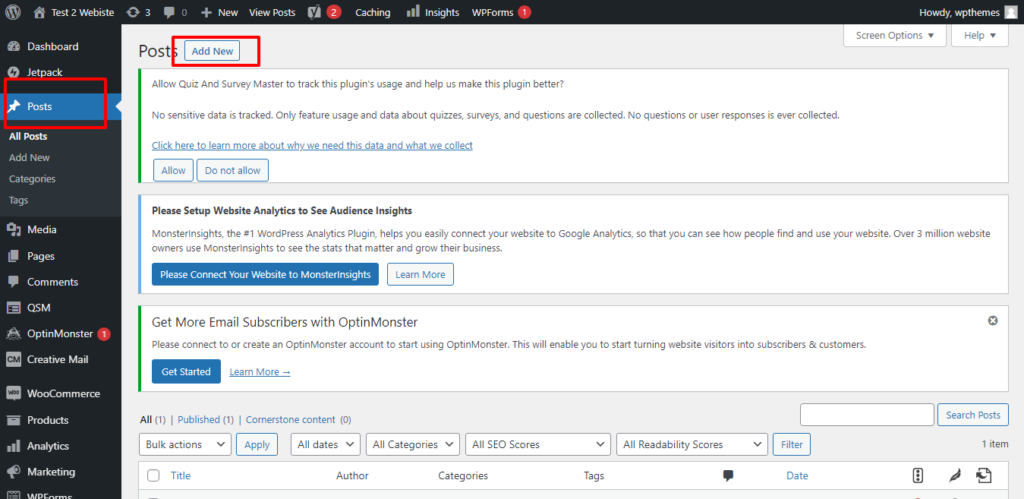
- Navigate to the Posts Section: In the WordPress Admin Dashboard, go to the “Posts” section located on the left-hand side. Click on “Posts” to access the posts management screen.
- Add a New Post: On the posts management screen, click on the “Add New” button to create a new post.
- Enter Post Content: In the post editor, enter the title and content for your post. You can use the formatting options to style your text, add images, videos, and other media to your post.
- Assign Categories to the Post: On the right-hand side of the post editor, you’ll find a section labeled “Categories”. Click on the “+ Add New Category” link to create a new category for your post or select an existing category by checking the corresponding checkbox. You can assign multiple categories to a single post.
- Save the Post: Once you have entered the content and assigned the categories, click on the “Save Draft” button to save the post as a draft. If you’re ready to publish the post immediately, click on the “Publish” button instead.
- View the Published Post: Visit your website’s front-end by entering your website URL in a new browser tab. You should now see the newly created post listed on your blog page or wherever your posts are displayed, with the assigned categories associated with it.
That’s it! You have successfully created a post and added categories to it in WordPress. You can always go back to the “Posts” section in the WordPress Admin Dashboard to edit or modify your posts, add or remove categories, or make any other desired changes.


