

Certainly! Here’s a step-by-step guide on how to install a free theme in WordPress:
- Access the WordPress Admin Dashboard: Log in to your WordPress website using your admin username and password. The login URL is typically “https://yourwebsite.com/wp-admin“.
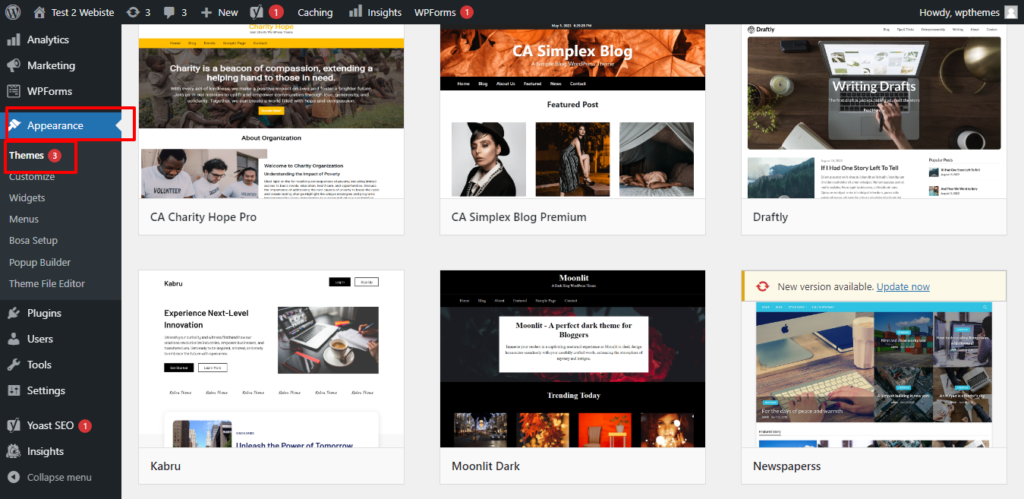
- Navigate to the Themes Section: After logging in, you’ll be directed to the WordPress Admin Dashboard. On the left-hand side, locate the “Appearance” tab and hover over it. This will reveal a submenu. Click on “Themes”.
- Add New Theme: You’ll be taken to the Themes page where you can manage your installed themes. Click on the “Add New” button at the top of the page.
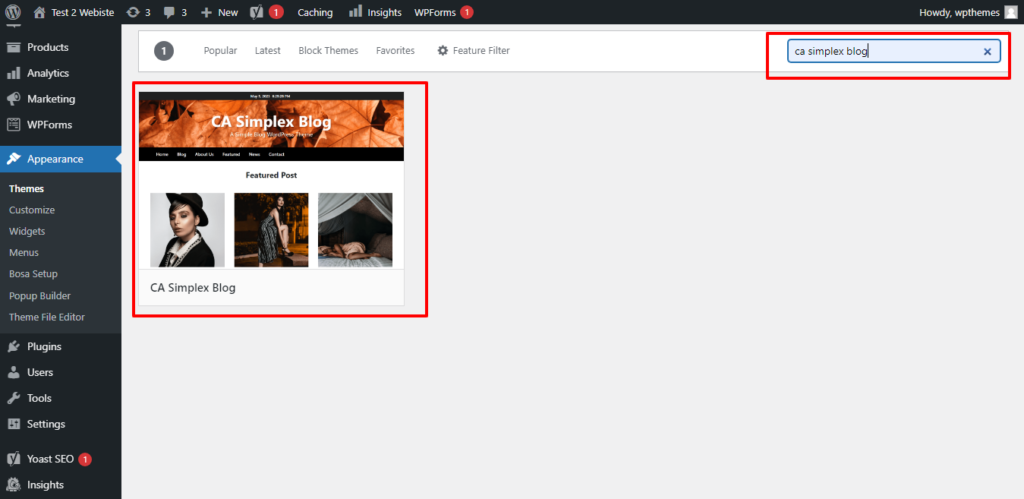
- Explore Free Themes: On the “Add Themes” page, you’ll see various tabs. Search for Out Theme for Example “CA Simplex Blog”
- Select a Theme: Once you find a free theme that you like, hover over its thumbnail image to reveal the “Preview” and “Install” buttons. Click on “Preview” to get a live preview of the theme or click on “Install” to proceed with the installation.
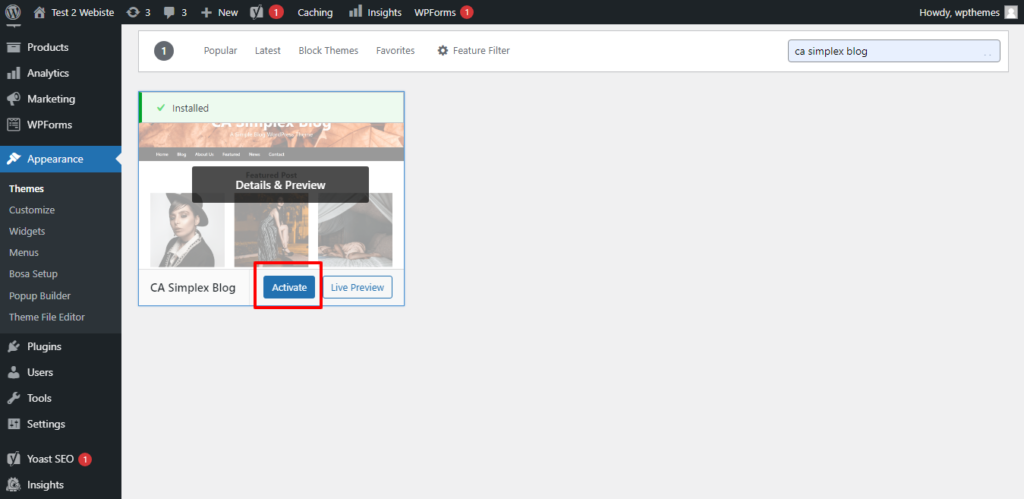
- Install the Theme: If you clicked “Install” in the previous step, WordPress will start installing the theme. After installation, the “Install” button will change to “Activate”. Click on “Activate” to activate the theme on your website.
- Customize the Theme (Optional): After activating the theme, you can customize its appearance and settings. To access the theme customization options, click on the “Customize” link under the “Appearance” tab in the WordPress Admin Dashboard. Here, you can modify various aspects such as site identity, colors, layouts, widgets, and more.
- Preview and Publish: While customizing your theme, you can preview the changes in real-time by clicking the “Preview” button. If you’re satisfied with the changes, click “Save & Publish” to make them live on your website.
That’s it! You have successfully installed a free theme in WordPress. Remember that the exact appearance and options may vary depending on the specific theme you choose, but the overall installation process remains the same.


